645 字 3 分钟阅读
使用 fast-cli 与 ntfy 实现代理服务器定时测速与推送通知
手上有几个代理服务器,想要定时晚高峰测试一下科学代理的速度,最好是记录成报告最佳推送到手机上,这样就可以及时了解各个服务器的状态。
以下是实践基于 fast-cli 测速和实现 ntfy 实时通知的过程记录,环境是 debian12 本地服务器,理论上也适用于其他 Linux 发行版。
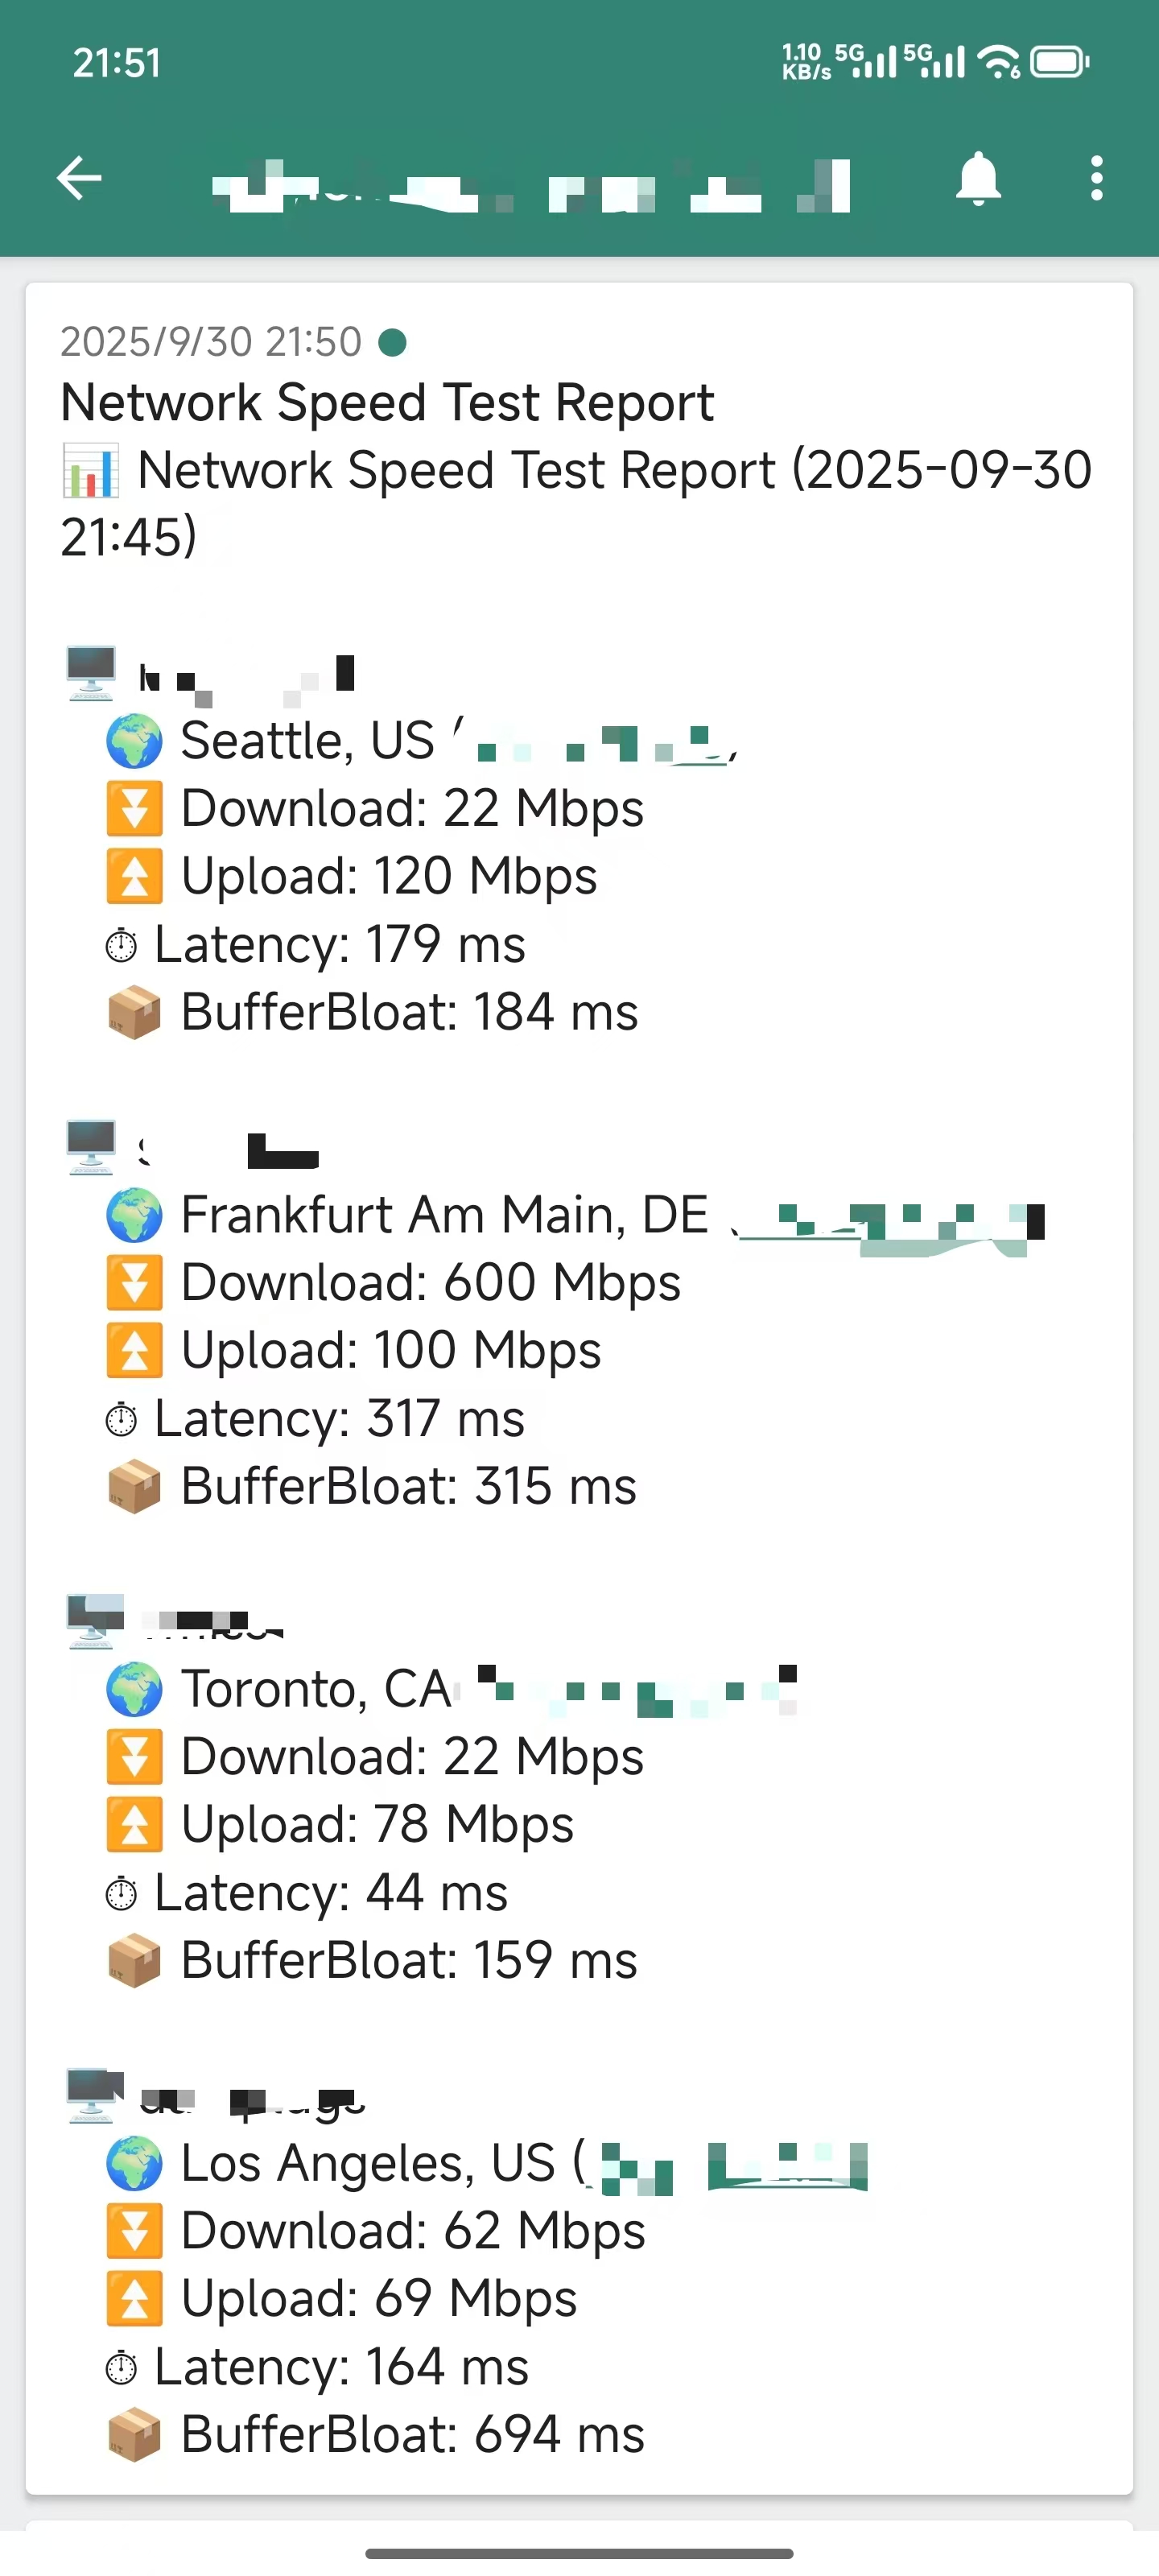
在手机上接收通知使用 ntfy 的官方 App,支持 iOS 和 Android,效果如下:
1. 准备
假设已搭建好网络 vpn,并在本地监听如下端口:
- http://192.168.1.1:8080
- http://192.168.1.1:8081
下面开始准备测速环境。
1.1. Docker 环境
使用 fast-cli 进行测速需要安装 npm 的复杂环境,使用 docker 直接运行 fast-cli 容器更加方便。
请确保服务器上已经安装了 docker,其安装如下:
# Add Docker's official GPG key:
sudo apt-get update
sudo apt-get install ca-certificates curl
sudo install -m 0755 -d /etc/apt/keyrings
sudo curl -fsSL https://download.docker.com/linux/debian/gpg -o /etc/apt/keyrings/docker.asc
sudo chmod a+r /etc/apt/keyrings/docker.asc

# Add the repository to Apt sources:
echo \
  "deb [arch=$(dpkg --print-architecture) signed-by=/etc/apt/keyrings/docker.asc] https://download.docker.com/linux/debian \
  $(. /etc/os-release && echo "$VERSION_CODENAME") stable" | \
  sudo tee /etc/apt/sources.list.d/docker.list > /dev/null
sudo apt-get update

sudo apt-get install docker-ce docker-ce-cli containerd.io docker-buildx-plugin docker-compose-plugin
测试是否安装成功:
docker --version
1.2. fast-cli 容器
fast-cli 没有提供官方的 docker 镜像。
这里选择直接封装一个,Dockerfile 如下:
FROM node:18-slim

ARG http_proxy
ARG https_proxy

RUN apt-get update && apt-get install -y curl libglib2.0-0 libnss3 \
    libatk1.0-0 libatk-bridge2.0-0 libcups2 libdrm2 libxkbcommon0 \
    libxcomposite1 libxdamage1 libxfixes3 libxrandr2 libgbm1 libasound2 \
    libpangocairo-1.0-0 libgtk-3-0 fonts-liberation && \
    rm -rf /var/lib/apt/lists/*
RUN npm install -g fast-cli
验证容器能否正常运行,构建并运行:
# 选择 1:不走代理构建
docker build -t fast-cli:latest .
# 选择 2:走代理构建
docker build -t fast-cli:latest . --build-arg http_proxy=http://192.168.1.1:8080 --build-arg https_proxy=http://192.168.1.1:8080

# 测试运行
docker run -it --rm --network host fast-cli:latest fast --help
1.3. 测速验证
运行容器,并挂上代理,验证 fast-cli 会走环境代理:
docker run -it --rm --network host \
  -e http_proxy=http://192.168.1.1:8080 \
  -e https_proxy=http://192.168.1.1:8080 \
  fast-cli:latest fast --json
顺利的话就可以看到代理点的 IP 和测速结果。
2. 通知
2.1. NTFY
NTFY 是一个非常轻量级的推送工具,支持多种平台,使用也非常简单,在手机上安装 ntfy 的 App 并订阅对应的主题即可。
官网: https://ntfy.sh/
考虑到安全性,也可以使用自建服务,只需在服务器上部署 ntfy 服务,采用 docker 部署,示例部署如下:
services:
  ntfy:
    image: binwiederhier/ntfy:v2.12
    container_name: ntfy
    command:
      - serve
    volumes:
      - /etc/timezone:/etc/timezone:ro
      - ./ntfy/cache:/var/cache/ntfy
      - ./ntfy/etc:/etc/ntfy
    ports:
      - 80:80
    healthcheck: # optional: remember to adapt the host:port to your environment
        test: ["CMD-SHELL", "wget -q --tries=1 http://localhost:80/v1/health -O - | grep -Eo '\"healthy\"\\s*:\\s*true' || exit 1"]
        interval: 60s
        timeout: 10s
        retries: 3
        start_period: 40s
    restart: unless-stopped
随后在 app 上自定义服务器地址并订阅主题即可。
2.2. 定时任务
为了实现通知的样式效果,这里定义了一个脚本 speedtest_notify.sh,内容如下:
#!/usr/bin/env bash

export PATH=/usr/local/sbin:/usr/local/bin:/usr/sbin:/usr/bin:/sbin:/bin
DOCKER=/usr/bin/docker
CURL=/usr/bin/curl
JQ=/usr/bin/jq

log() {
  local level=$1; shift
  printf '[%s] %s: %s\n' "$(date '+%Y-%m-%d %H:%M:%S')" "$level" "$*" >&2
}
log_info() { log INFO "$@"; }
log_warn() { log WARN "$@"; }

declare -A PROXIES=(
  ["serverA"]="http://192.168.1.1:8080"
  ["serverB"]="http://192.168.1.1:8081"
)
NTFY_TOPIC="https://ntfy.sh/fast-cli"
TIMEOUT_SECONDS=${FAST_TIMEOUT_SECONDS:-180}

report="📊 Network Speed Test Report ($(date '+%Y-%m-%d %H:%M'))"$'\n\n'

for server in "${!PROXIES[@]}"; do
  proxy="${PROXIES[$server]}"
  log_info "Starting speed test for ${server} via ${proxy}"
  json=$(timeout "${TIMEOUT_SECONDS}" $DOCKER run --rm \
    -e http_proxy=$proxy \
    -e https_proxy=$proxy \
    --network host \
    fast-cron:latest fast --upload --json 2>/dev/null)
  status=$?
  if [[ $status -eq 124 ]]; then
    log_warn "Speed test timed out for ${server} after ${TIMEOUT_SECONDS}s"
    report+="🖥 ${server}"$'\n'
    report+="   ⏳ Timed out after ${TIMEOUT_SECONDS}s"$'\n\n'
    continue
  fi

  if [[ $status -ne 0 ]]; then
    log_warn "Speed test exited with code ${status} for ${server}"
    report+="🖥 ${server}"$'\n'
    report+="   ⚠️ Speed test failed"$'\n\n'
    continue
  fi

  if [[ -z "$json" ]]; then
    log_warn "Speed test returned empty output for ${server}"
    report+="🖥 ${server}"$'\n'
    report+="   ⚠️ Speed test failed"$'\n\n'
    continue
  fi

  dl=$(echo "$json" | $JQ -r '.downloadSpeed')
  dlUnit=$(echo "$json" | $JQ -r '.downloadUnit')
  ul=$(echo "$json" | $JQ -r '.uploadSpeed')
  ulUnit=$(echo "$json" | $JQ -r '.uploadUnit')
  lat=$(echo "$json" | $JQ -r '.latency')
  bloat=$(echo "$json" | $JQ -r '.bufferBloat')
  loc=$(echo "$json" | $JQ -r '.userLocation')
  ip=$(echo "$json" | $JQ -r '.userIp')

  report+="🖥 ${server}"$'\n'
  report+="   🌍 ${loc} (${ip})"$'\n'
  report+="   ⏬ Download: ${dl} ${dlUnit}"$'\n'
  report+="   ⏫ Upload: ${ul} ${ulUnit}"$'\n'
  report+="   ⏱ Latency: ${lat} ms"$'\n'
  report+="   📦 BufferBloat: ${bloat} ms"$'\n\n'
done

log_info "Sending report to ${NTFY_TOPIC}"
$CURL -s -H "Title: Network Speed Test Report" -d "$report" "$NTFY_TOPIC" >/dev/null 2>&1
脚本说明:
- 更改
PROXIES数组,添加或修改代理服务器地址。 NTFY_TOPIC设置为你的 ntfy 主题地址。TIMEOUT_SECONDS设置测速超时时间,默认 180 秒。- 需要确保
docker、curl、jq的路径正确。
运行测试:
chmod +x speedtest_notify.sh
./speedtest_notify.sh
测试后收到通知,表示没问题,然后设置定时任务:
crontab -e
添加如下内容,每天晚上 8 点执行:
30 20 * * * /path/to/speedtest_notify.sh
3. 结束
通过以上设置,就可以实现晚高峰定时测速并推送到手机的功能,方便随时了解各个代理服务器的状态,后续新增服务器只需要在脚本中添加对应的代理地址即可。
暂无留言,来做第一个吧。